The Indentation Project, Part 1: Designing a 6-Tatami-Mat Room That Has to Serve Four Uses
The step-by-step build gallery is here.
The problem: four uses, one 6 tatami mat room
Anyone who likes making things eventually runs into the same problem: where do the things you make actually go? A 6 tatami room (about 9.7㎡) has to hold craft materials, display the things you make, give you a surface to work on, and still seat you on a sofa at the end of the day. Pile four jobs onto one room and every off-the-shelf option falls short.
Shelving from IKEA or Nitori eats floor area without ever reaching the ceiling, and units bought piecemeal never match in size or finish — the room reads as a patchwork. And off-the-shelf furniture can’t pull the sofa into the structure in the first place. A sofa is a thing you place; a shelf is a thing you stand up. The moment they sit in the room as separate objects, even when everything technically fits, you’re left with half-measures: no real work surface, and it looks wrong.
The only way to solve all of it was to use the full height of the wall and pull the sofa into a single skeleton. But it’s a rental — so having to take the whole thing back apart at move-out becomes the first constraint.

Modeling the whole thing in Fusion 360 before buying a single board
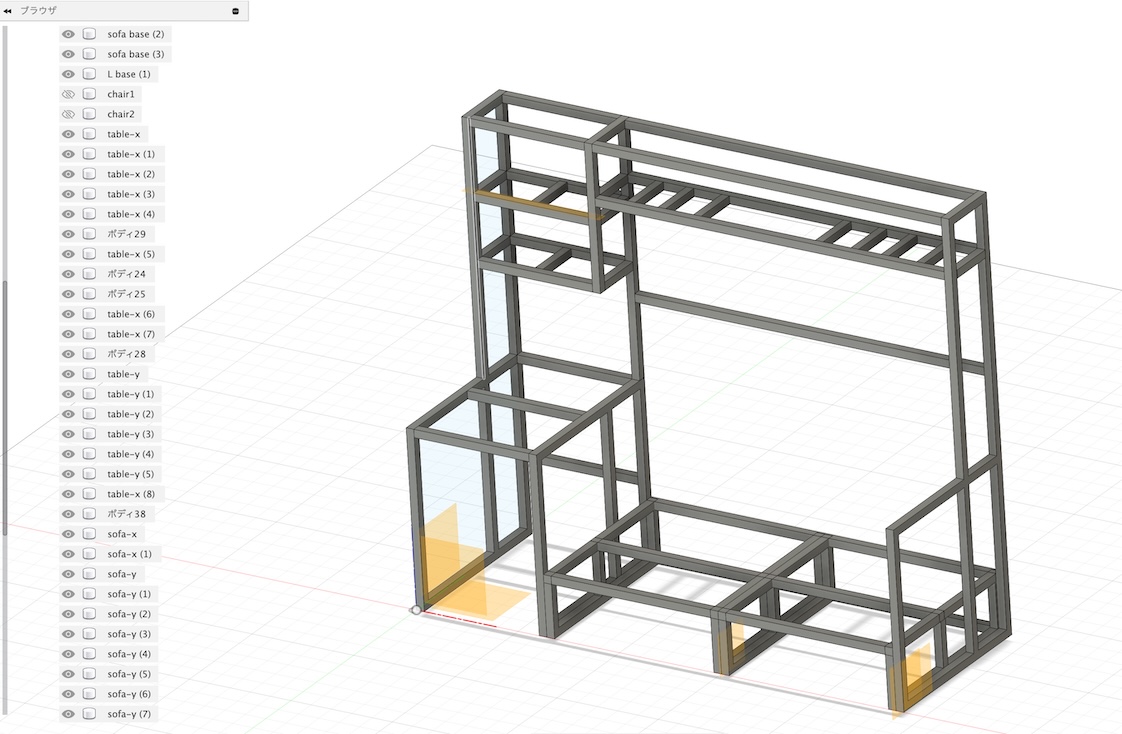
I modeled the entire structure in Fusion 360 before buying any lumber: use the full height of the wall, add zero floor footprint, and lock every part’s dimensions before sourcing the wood.
The frame is almost entirely 2x2. The one exception is the center beam under the sofa platform, which carries a seated person’s weight, so that’s 2x4. Several shelves are cantilevered — supported on one or two sides only — to work the indentations in visually while keeping the sightline open and the space usable when you’re sitting on the sofa.
The rule at the root of the design was no glue on any frame joint — full disassembly. Every joint had to break down into pieces small enough to carry out of a rental without marking the walls.
Why Kreg pocket holes
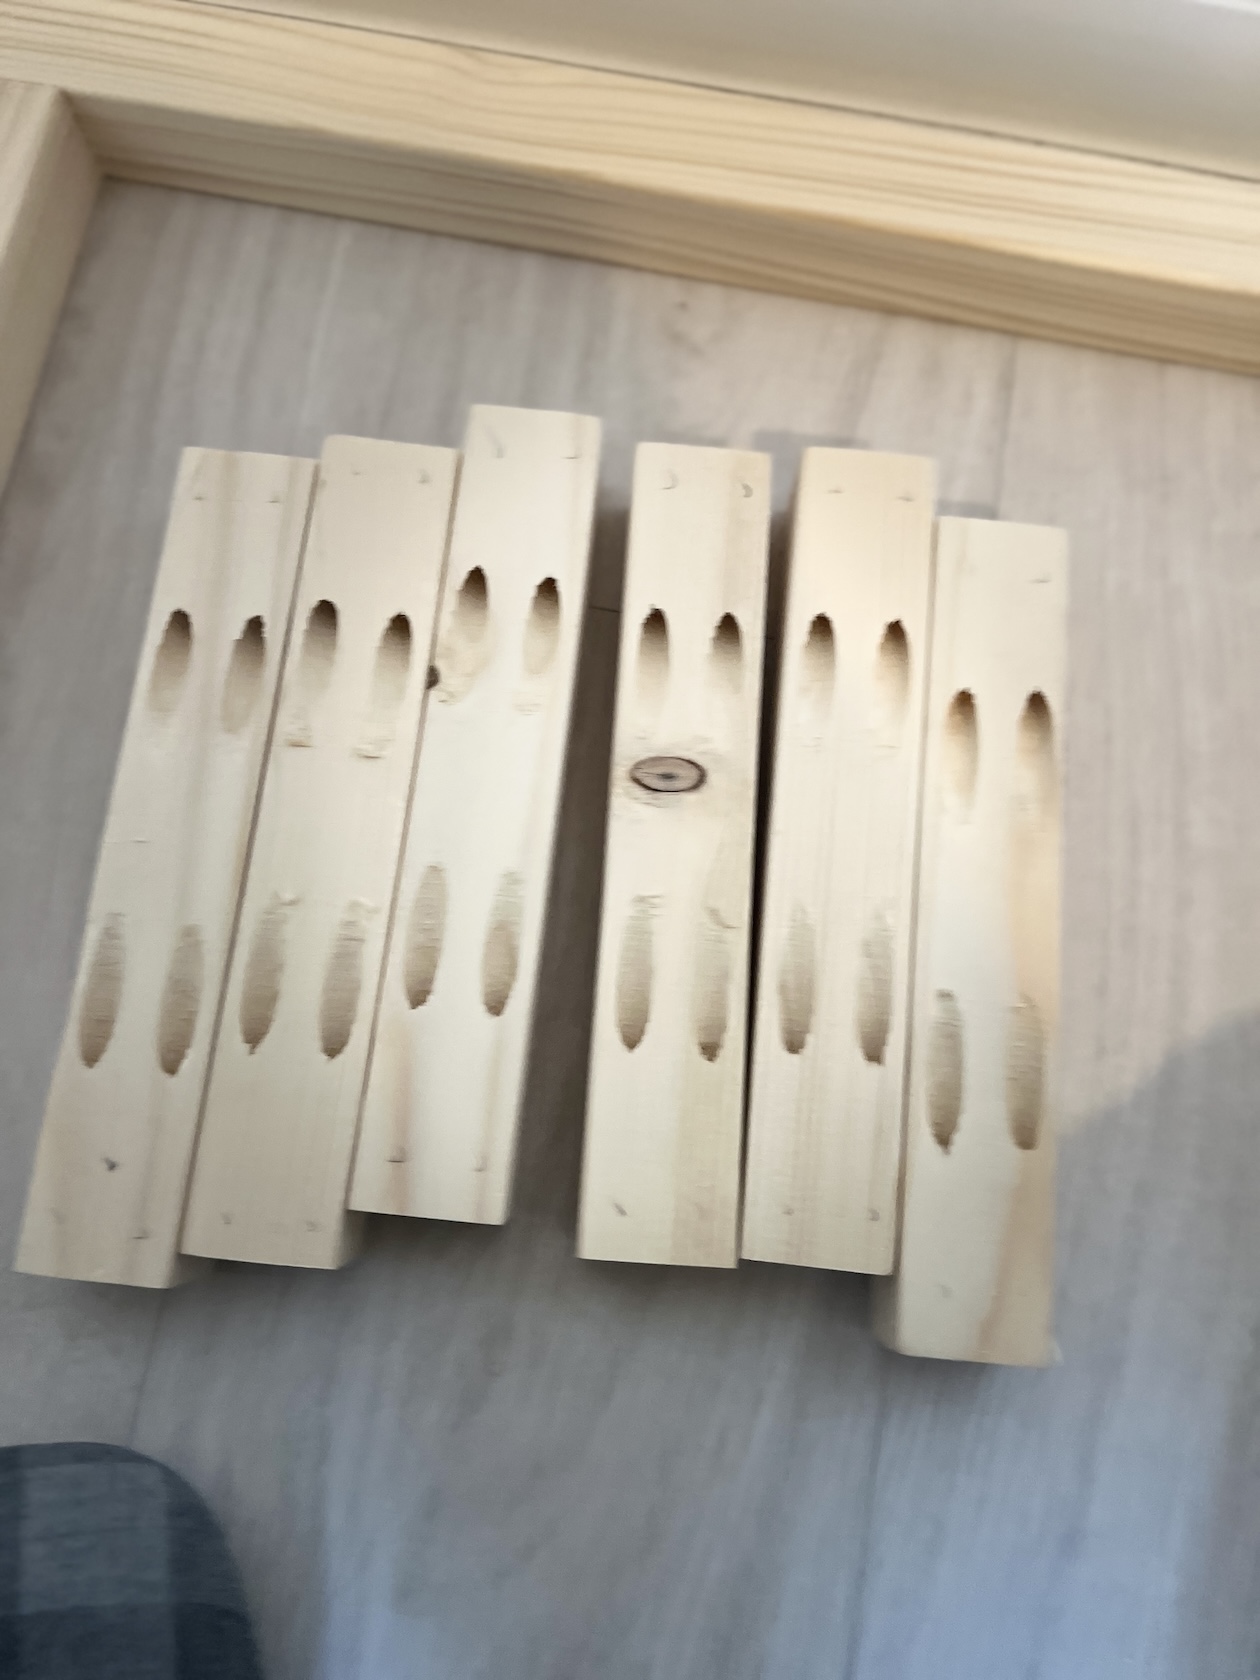
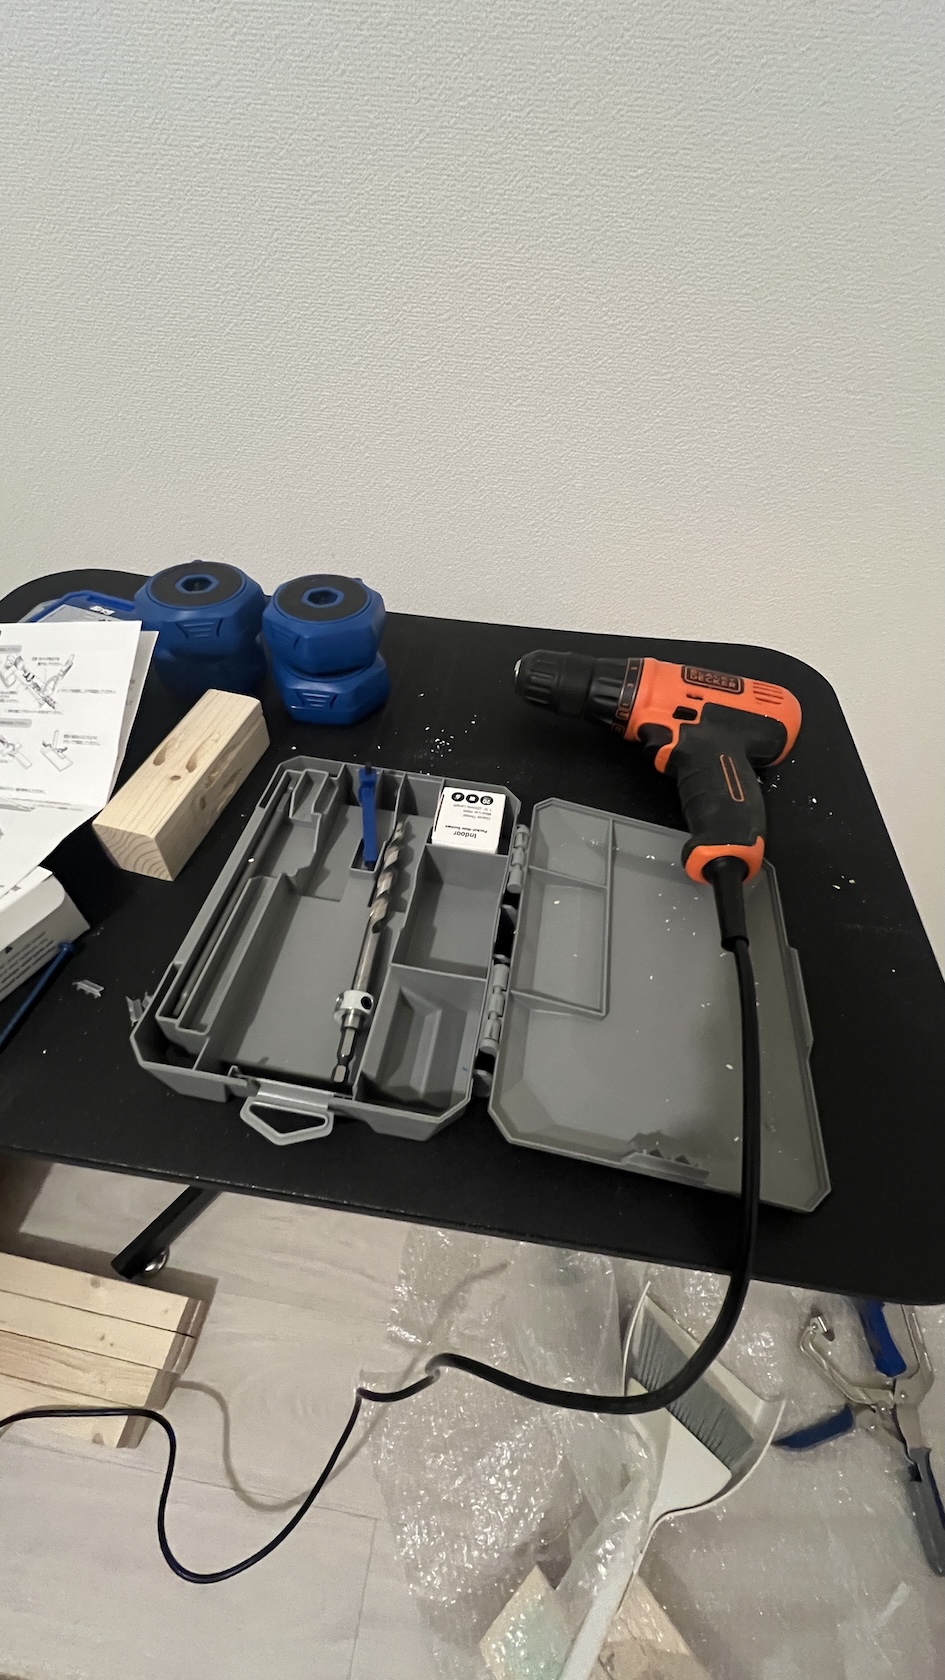
I joined the frame with Kreg pocket-hole joinery: two angled holes drilled into each board end, screwed from a hidden face. No visible hardware, and a strong joint.
Pocket holes scale. A structure like this needs hundreds of identical joints. Cutting a traditional joint hundreds of times isn’t realistic — but clamping a jig and drilling two holes is just the same motion repeated however many times, and assembly and disassembly both run on that.
Building the frame
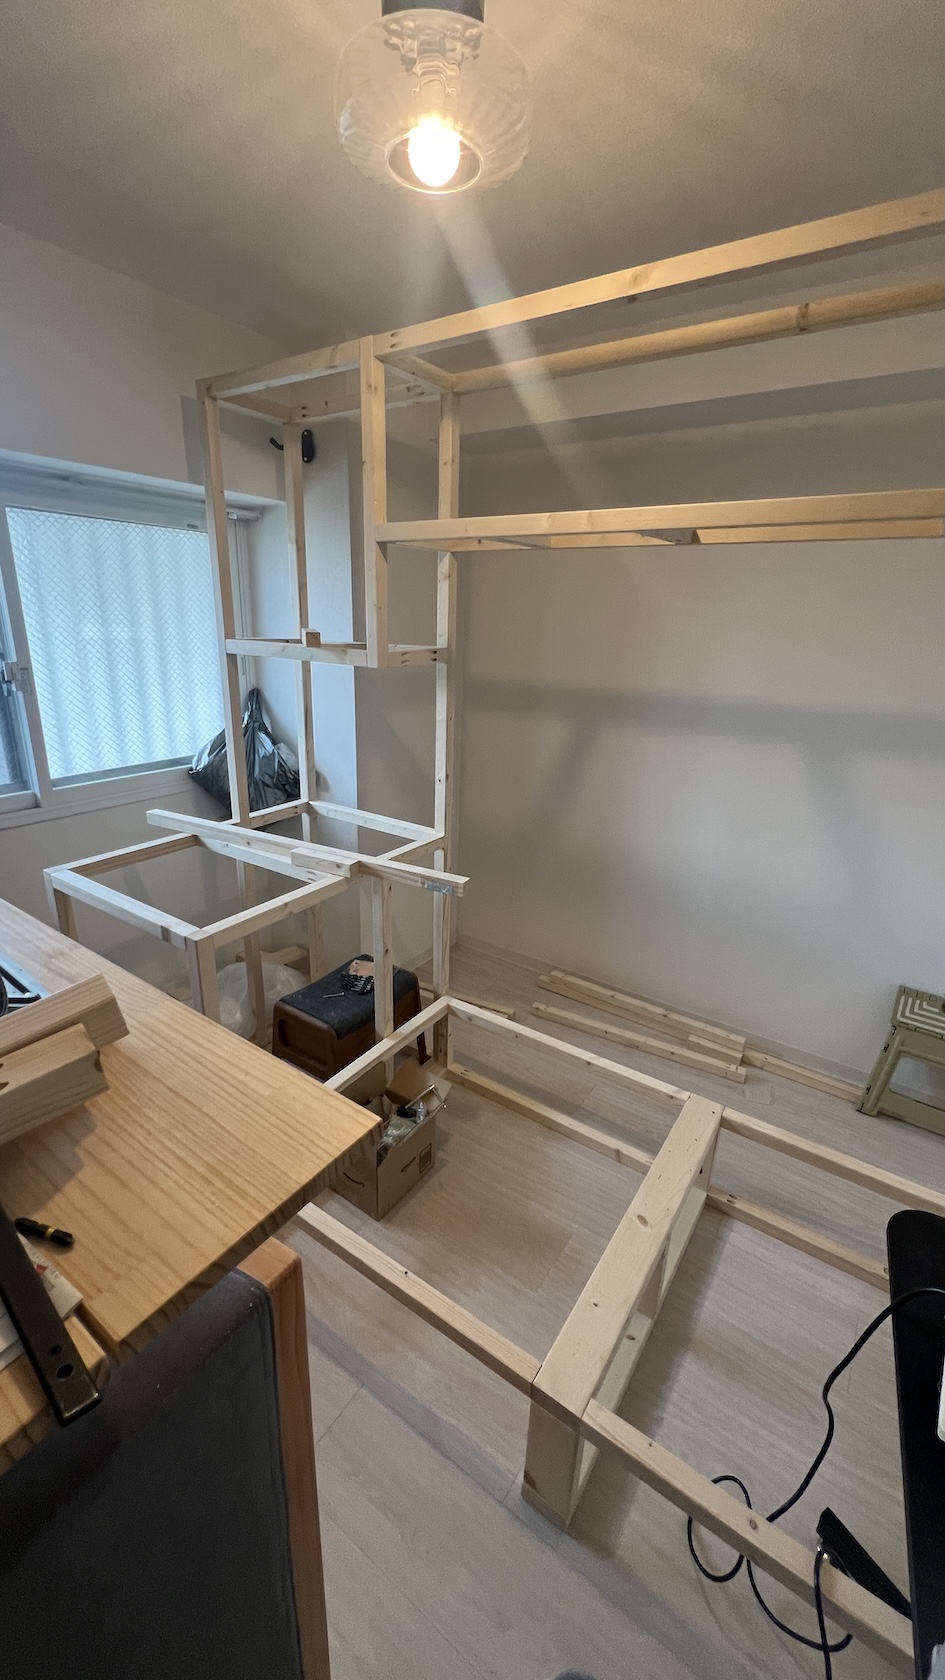
Assembly went in three stages: the sofa base first, then the verticals, then the horizontal beams. You don’t stack bottom to top — you fix the load-bearing base, stand the verticals into it, and tie them together with the horizontals. From across the room, it already looked finished at this point.
What the model didn’t catch
The design had a middle partition in the upper-left shelf section. On screen it looked tidy, but once assembled, that one board cramped the space and kept anything tall from fitting. Right on the drawing, in the way in the room — so I took it out.
And drilling the pocket holes scattered wood chips across the whole apartment. I’d set up to contain them, but drill a few hundred holes and the sawdust travels well past wherever you thought the mess would stay.
What I’m taking forward
The model helped enormously, but a lot only becomes clear once you see the real thing. Fusion 360 meant almost no wasted material — yet, like that partition, there are always spots that are right on screen and just don’t work in the room. The model is a perfect tool for nailing down the shopping list, but guaranteeing how it feels to use took the finishing work by hand.
To put the same trap in software terms: it’s a bit like the gap between a build passing and the system actually holding up in production.
And designing for disassembly paid off all the way through. I sized the verticals as smallest-repeatable-units for the sake of move-out. That decision helped me in Part 2: when I build the under-sofa drawer, the leftover offcuts turn out to be sized almost exactly to its interior. The modular design paid off further than the original design intended.
The frame held the sofa and the skeleton stood. But the shelves still had no surfaces, the space under the sofa was a hollow cavity, and there was nowhere to set a single book down. In ver2: adding the top boards and a drawer, and getting it to the point where the room is actually usable.
The full ver1 build gallery is here.